
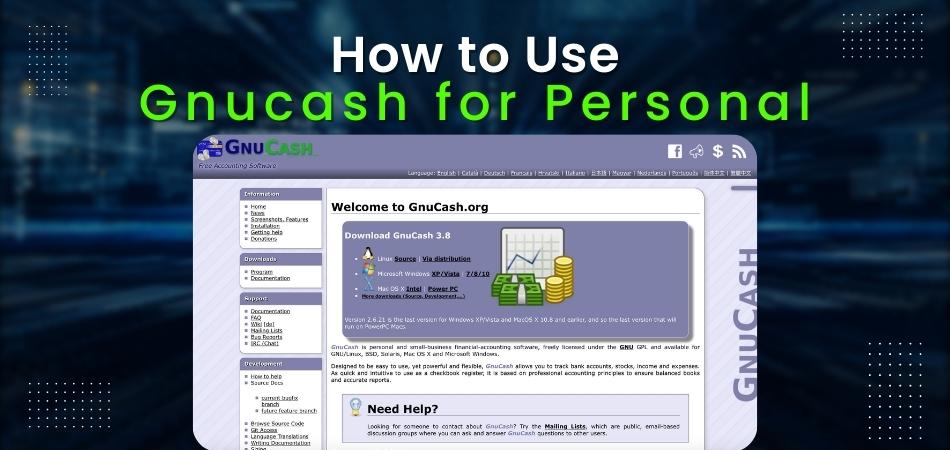
How to Use Gnucash for Personal?
Anúncios
In the past, I used Microsoft Money and Quicken to manage my personal finances. But now that I’ve switched to GnuCash, I don’t think I’ll ever go back! Here’s why: GnuCash is free software that you can download from the internet.
It runs on Windows, Mac, and Linux platforms. And it has all the features of a commercial finance program like Microsoft Money or Quicken. Plus, it’s much easier to use!
- Download Gnucash for your personal computer from the internet
- Install the program onto your computer
- Follow the on-screen instructions to set up an account
- Use Gnucash to manage your finances by tracking income and expenses, creating budgets, and more
Credit: nickjanetakis.com
Anúncios
Is Gnucash Good for Personal Finance?
There is no one-size-fits-all answer to this question, as the best personal finance software for you will depend on your specific financial needs and goals. However, GnuCash is a good option for many people looking for a budgeting and money management tool. Here are some of the key benefits of using GnuCash:
1. It’s free! GnuCash is open source software, which means that it’s completely free to download and use. This makes it a great option for those on a tight budget.
2. It’s flexible. GnuCash offers a variety of features and options, making it suitable for everything from simple money management to complex financial analysis. You can customize it to suit your specific needs.
3. It’s easy to use. Although GnuCash has a lot of features, it’s still relatively easy to use thanks to its intuitive interface. Even if you’re not familiar with accounting concepts, you should be able to get the hang of it fairly quickly.
4. It supports multiple currencies. If you need to track finances in more than one currency, GnuCash can handle that easily thanks to its built-in currency conversion feature. This is especially useful if you frequently travel or do business internationally.
5 .It has strong security features . One important consideration when choosing personal finance software is security – after all, you’ll be storing sensitive information like bank account numbers and passwords in the program .
GnuCash uses industry-standard encryption techniques to keep your data safe , so you can rest assured that your financial information is well protected . Overall ,GnuCash is definitely worth considering if you’re looking for personal finance software .
How Do You Use Gnucash?
Assuming you would like a blog post discussing the basics of using GnuCash:
GnuCash is a free and open source accounting software program that is available for Windows, Mac, and Linux systems. It can be used for managing personal finances, small business accounting, and even large enterprise finance operations.
Despite its name, GnuCash is actually quite easy to use. The interface is designed to be intuitive and user-friendly. Even if you’ve never used an accounting program before, you should be able to figure out how to use GnuCash with just a little bit of exploration.
Here are the basic steps for using GnuCash:
1) Download and install the software from https://www.gnucash.org/downloads/. If you’re not sure which version to get, go with the “Stable Release” option.
2) Launch GnuCash and create a new file by going to File > New > Empty File. Give your file a name and location, then click “OK”.
3) You will now be prompted to set up your accounts.
Here you can create different categories for your income and expenses (e.g., “Utilities”, “Entertainment”, etc.). Once you’ve created all the necessary accounts, click “OK”.
4) Now it’s time to start entering transactions!
To do this, go to the Accounts window (you can find this in the top menu bar). Find the account where you want to enter a transaction, then double-click on it. This will open up the Transaction Editor window where you can fill in all the details about your transaction.
When you’re finished, click “Post” to save it. Repeat this process for each transaction you want to enter into GnuCash.
5) That’s really all there is to it! You can keep track of your progress by periodically checking the Balance Sheet report (found under Reports > Finance). This will show you how much money you have in each account as well as your overall net worth . . . which hopefully keeps growing larger over time!
Anúncios
How Do I Set Up Gnucash?
Assuming you would like a step by step guide on how to set up GnuCash:
1.First, you need to download and install GnuCash. You can get it from here.
2.Once it’s installed, launch the application and you will see the following window. Click “Yes” to create a new file or “No” to open an existing one.
3.If you clicked “Yes” in the previous step, you will be asked to select the currency for your country.
Choose wisely because you can’t change it later without re-installing GnuCash.
4.The next screen is where things start to get interesting. Here, you need to decide whether you want to use GnuCash for personal or business purposes (or both).
If unsure, click on both and then hit Forward .
5.(This is an important step!) The next screen allows you to set up your accounts . You can either do this manually by clicking on the “Create Account” button or automatically by importing data from another program such as Quicken (see next section).
For now, let’s go with the manual option so click on “Create Account” .
6.A new window will pop-up asking for the account details such as name , type , and description . Once done, click OK .
7.(Another important step!) Now that your first account is created, it needs to be added under an appropriate parent account . For example, if you are setting up a checking account , its parent could be Liabilities:Checking Accounts since technically speaking, the bank owns your money until you spend it! Select the appropriate parent from the drop-down menu and then hit Forward .
8.On the next screen , simply click Finish and that should take care of everything!
How Do I Enter Transactions in Gnucash?
Assuming you would like a step by step guide on how to enter transactions in GnuCash:
1. Open GnuCash and select the account you wish to make a transaction in. For this example, we will use the Assets:Bank:Checking account.
2. Find the date of the transaction and double click on the date in question or click once and then press Enter.
3. A new window will pop up asking for the Transaction Details. In the first field, Description, enter a brief description of what this transaction is for (examples might be “Rent” or “Grocery shopping”).
4. The second field, Notes, can be used for further details about the transaction if needed but is not required.
5. Next, choose whether this is a Deposit or Payment using the radio buttons below Description and Notes. In our example, we will choose Payment since we are making a withdrawal from our checking account balance.
6. Now we need to specify which account(s) this money is coming from/going to using the Split Transaction feature just below Deposite/Payment radio buttons.. To do this, first click on Split button which should now highlight in green indicating it has been selected.
.You should now see two additional columns appear in your Transactions table labeled Account and Amount..In our example, since we are making a purchase with cash from our checking account, we would select that same account name in split view’s Account column..Next to it in amount column type out the amount of cash being withdrawn from checking eg $50..
.Now lets say were also buying an item on sale for $30 that was originally $40 so we saved $10…To add this extra detail into our accounting lets create another row by clicking again on green highlighted split button which adds another blank row beneath previous one entered..This time leave Account column blank but enter -$10 in amount column signifying 10 dollars being spent…If everything looks good so far then press OK at bottom right of window.
.A new dialog box pops up asking Are you sure? Press Yes followed by OK again and your all done! Your newly created transaction should now appear back in main Transactions view within specified date range
Assuming you would like more information about why certain fields are important when entering transactions:
GnuCash for Personal Finance: Getting Started and Basics
Gnucash Tutorial
Assuming you would like a tutorial on Gnucash:
Gnucash is a free and open source accounting program that was originally created for Linux but is now also available for Windows and Mac. While it may not be as well-known as some of the other accounting software out there, it’s actually a very powerful program that can be used for everything from managing your personal finances to running a small business.
One of the great things about Gnucash is that it’s very user-friendly and easy to learn. Even if you’ve never used accounting software before, you should be able to get up and running with Gnucash fairly quickly. In this tutorial, we’ll show you how to set up and use Gnucash to track your income and expenses.
To get started, go ahead and download Gnucash from their website (gnucash.org). Once it’s installed on your computer, launch the program and you’ll see the following screen:
The first thing you need to do is create a new file where you’ll store all of your data.
To do this, go to the File menu at the top of the screen and select “New File.” A new window will pop up asking you to choose where you want to save your file; just choose any location on your hard drive and click “Save.”
Once your new file has been created, you’ll see the main Gnucash window:
This may look overwhelming at first glance, but don’t worry – we’ll only be using a small portion of these features in this tutorial. The left column contains a list of all of the different types of data that can be stored in Gnucash; we’ll mostly be working with Accounts, Transactions, and Prices. The right column shows some helpful information about each selected item; we won’t be covering this in detail here but feel free to explore on your own later.
Gnucash Review
GnuCash is a free, open source financial accounting program that has been around since 2000. It’s designed to be easy to use, yet powerful enough to handle the finances of a small business or household.
I’ve been using GnuCash for my personal finances for several years now, and I’m really happy with it.
It’s helped me keep track of my spending, budget better, and stay on top of my bills. In this GnuCash review, I’ll share what I like about it and how it can help you with your finances.
One of the things I like best about GnuCash is its flexibility.
You can set it up to track your income and expenses in whatever way makes sense for you. For example, you can create separate accounts for different types of expenses (e.g., food, gas, clothes) or create sub-accounts within an account (e.g., tracking spending on different credit cards).
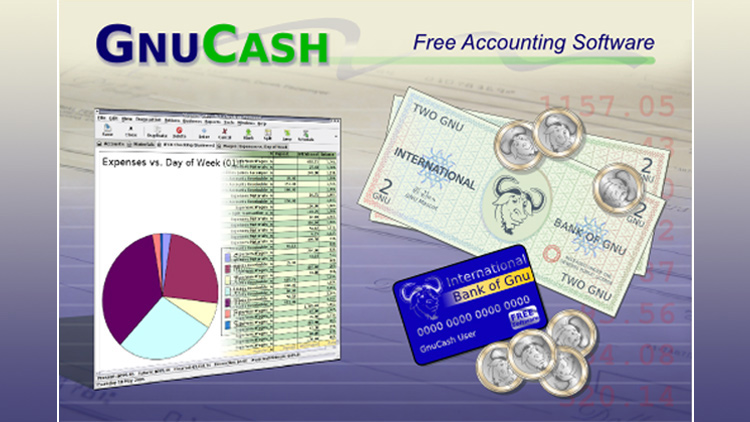
Another great feature is the ability to generate reports.
This can be helpful in seeing where your money is going and identifying areas where you may be able to cut back on spending. Reports can also be useful in tax preparation by providing documentation of your income and expenses.
Overall, I highly recommend GnuCash as a finance tracking tool – whether you’re trying to get a better handle on your personal finances or manage the finances of a small business.
It’s easy to use yet powerful enough to meet your needs. Give it a try – you may find it helpful in getting your financial affairs in order!
How to Install Gnucash on Mac
Gnucash is a free and open source accounting software that can be used on Mac computers. In this blog post, we will provide detailed instructions on how to install Gnucash on your Mac computer.
Before we begin, please note that you will need to have the Xcode development tools installed on your computer in order to compile and install Gnucash.
You can download and install Xcode from the Mac App Store.
Once you have Xcode installed, please launch it and accept the terms of use. Then, open a terminal window and type the following command:
xcode-select –install
This command will install the necessary developer tools for compiling and installing Gnucash.
Now that we have all of the necessary tools installed, we can proceed with downloading the Gnucash source code.
You can do this by visiting the Gnucash website (https://www.gnucash.org/downloads/) and clicking on the “Download” button for the latest stable release (currently 3.8).
Once the file has finished downloading, double-click on it to expand it, then double-click again on the resulting “.tar” file to uncompress it. This will create a new folder called “gnucash-3.8” in your current directory.
Gnucash Chromebook
Gnucash is a free and open source accounting software that can be used on any computer, including Chromebooks. While Gnucash does not have an official app for Chromebooks, there are a few ways to get it running on your device.
The first way is to use the Chrome Remote Desktop app to access a Gnucash installation on another computer.
This requires setting up the other computer with Gnucash and making sure it’s always turned on and connected to the internet. But once that’s done, you can access and use your Gnucash account from anywhere using your Chromebook.
Another way to run Gnucash on your Chromebook is by using Crouton to install it alongside Chrome OS.
This gives you the best of both worlds – the security and simplicity of Chrome OS, plus the ability to run full-fledged Linux apps like Gnucash. However, this method requires more technical knowledge than using Chrome Remote Desktop, so we’ll just briefly mention it here.
If you’re looking for an easy-to-use accounting software that works great on Chromebooks, give Gnucash a try!
Conclusion
Are you looking for a personal finance software that is both easy to use and powerful? Then Gnucash may be the perfect solution for you! In this blog post, we will show you how to use Gnucash for personal finance so that you can better manage your money.
Gnucash is a free and open source personal finance software. It has all the features you would expect from a good personal finance software, such as support for multiple accounts, transactions, categories, and budgets. It also has some unique features, such as the ability to track your stock portfolios and generate reports.
The first step in using Gnucash is to create an account. You can either create a new account or import an existing one from another software. If you are creating a new account, you will need to specify the account type (e.g., checking, savings), name, currency, and opening balance.
Once you have created an account, you can start adding transactions.
Each transaction has a date, description, amount, and category. You can also assign each transaction to one or more accounts.
For example, if you pay your rent with your credit card, you would create a transaction with the amount of rent in the “Amount” field and select both your checking account and credit card in the “Accounts” field. Transactions can also be recurring so that they are automatically added to your Gnucash file on a regular basis (e.g., monthly rent).
After adding some transactions, you can begin to see how Gnucash can help you manage your finances better.
For example, by categorizing your transactions into different groups (e.g., housing, food), you can get a better idea of where your money is going each month. You can also set up budgets so that Gnucash will warn you when you are close to overspending in certain areas (e).


