
How to Void Check in Quickbooks?
Anúncios
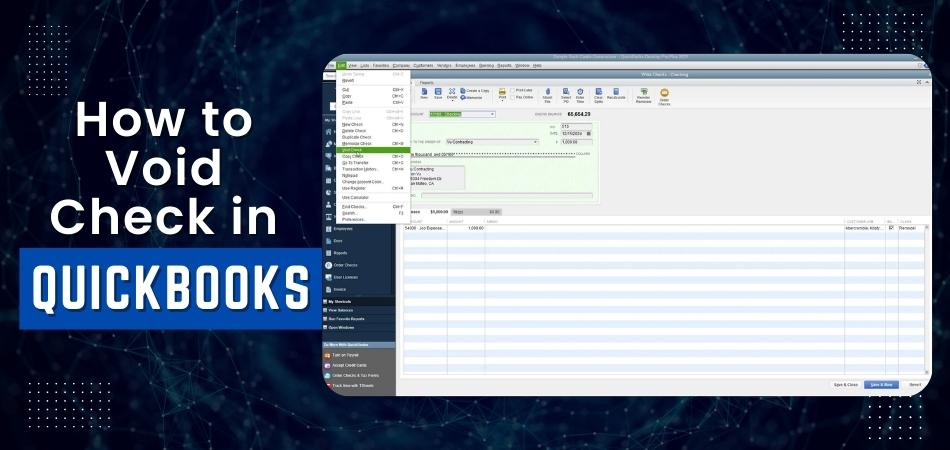
When you need to void a check in Quickbooks, there are a few steps you’ll need to follow. First, open up the “Checks” menu and find the check you need to void. Once you’ve selected the check, click on the “Edit” menu and then select “Void Check.”
A pop-up window will appear asking if you’re sure you want to void the check; click “Yes” to confirm. That’s all there is to it!
- Go to the “Banking” menu and select “Write Checks
- Find the check you want to void and click on it
- Click on the “Void Check” button at the bottom of the screen
- A pop-up window will appear asking you to confirm that you want to void the check; click “OK
How to Void a Check in QuickBooks
How Do I Void a Check in Quickbooks Desktop?
Assuming you would like tips for voiding a check in QuickBooks Desktop:
1. Go to the Banking menu and select Write Checks, or use the keyboard shortcut Ctrl+W.
2. In the Write Checks window, select the check you want to void from the Open Checks drop-down list.
Or, if you’re creating a new check, enter all relevant information except for the Check # (this will be generated automatically).
3. Click Save & Close. The check will appear in your register with a status of Void.
Anúncios
How Do I Enter a Void Check in Quickbooks Online?
Assuming you would like a step-by-step guide on how to enter a void check in QuickBooks Online:
1. Log into your QuickBooks Online account and go to the Dashboard.
2. Under the “Transactions” section, click on “Checks.”
3. Find the check that you need to void and click on it to open it.
4. Click on the “Void” button at the top of the page.
5. A pop-up window will appear asking you to confirm that you want to void the check – click “OK.”
6. The check will now be voided and will appear as such in your records.
How Do I Void a Refund Check in Quickbooks Desktop?
When you need to void a refund check in QuickBooks, the process is actually quite simple. Here’s how to do it:
1. Go to the Vendors menu and select Write Checks.
2. In the Check # field, enter the check number of the refund check you need to void.
3. Under the Expenses tab, select the vendor that issued the refund check from the Pay To drop-down list.
4. Enter void in the Memo field.
5. Click Save & Close.
Anúncios
How Do You Void a Check in Quickbooks Without Affecting Prior Periods?
Assuming you’re referring to QuickBooks Online (QBO), here’s how you would void a check:
1. Go to the “+” sign in the top navigation bar and select “Check.”
2. Enter in all relevant information for the check, including the date, payee, amount, etc.
3. Save and close the check.
4. To void the check, go back into it and click “Edit.”
5. Change the status from “Open” to “Voided.”
6. Save and close the check again.
That’s it! This process can be done without affecting prior periods because you’re simply editing an existing transaction.

Credit: www.chortek.com
How to Void Check in Quickbooks Online
Assuming you would like a blog post discussing how to void a check in QuickBooks Online:
“How to Void Check in Quickbooks Online”
QuickBooks Online makes it easy to void checks that have been entered into the system.
This can be done by following these simple steps:
1) Go to the “Banking” tab and select “Check Register”.
2) Find the check you wish to void and click on it to open up the check details.
3) Click “Void Check” at the top of the page.
4) A pop-up window will appear asking you if you’re sure you want to void the check – click “OK”.
5) That’s it!
The check will now be voided and will no longer appear in your register.
How to Void a Check in Quickbooks Desktop 2021
Assuming you would like a blog post discussing how to void a check in Quickbooks Desktop 2021:
“Voiding a check in QuickBooks is easy and only takes a few steps. Here’s how to do it:
1. Open QuickBooks and go to the “Banking” menu.
2. Find the check you want to void and click on it once to select it.
3. Click the “Edit” button at the top of the screen (it looks like a pencil).
4. In the “Check #” field, type in “VOID” next to the original check number. You can also add a note explaining why you’re voided the check, if you want.
5. Save your changes by clicking the “Save & Close” button.
How to Void a Check in Quickbooks After Reconciliation
Few things are more frustrating than finding an error in your QuickBooks reconciliation. Whether it’s a mistake you made or an incorrect transaction that was entered, it can throw off your whole system. If you need to void a check in Quickbooks after reconciliation, here’s how to do it:
1. Go to the Checks menu and select Void Check.
2. Enter the check number of the check you wish to void and click OK.
3. You will be prompted to enter a reason for why you are voiding the check.
Choose the appropriate option from the dropdown list and click OK.
4. The check will now appear as voided in your records.
Conclusion
There are a few different ways that you can void a check in Quickbooks. The first way is to go into the “Banking” menu and then selecting the “Void Check” option. This will bring up a list of all the checks that have been written, and you can then select the one that you want to void.
Another way to void a check is to go into the “Edit” menu and then selecting the “Void Check” option. This will also bring up a list of all the checks that have been written, and you can then select the one that you want to void.
The last way to void a check is to go into the “Reports” menu and then selecting the “Voided Checks” report.
This will show you all of the checks that have been voided, and you can then select the one that you want to void.


