
How to Mark an Invoice Paid in Quickbooks?
Anúncios
Assuming you have already set up your company in Quickbooks and have been recording invoices, here are the steps to take to mark an invoice as paid. Open the Quickbooks software and go to the Customers tab. Find the customer whose invoice you wish to mark as paid and double-click on their name to open their profile.
On the Customer Profile page, click on the Transactions tab and then find the invoice you want to mark as paid. Double-click on the invoice number to open it. At the top of the invoice, change the status from ‘Open’ to ‘Paid.’
Save your changes by clicking on File > Save or by pressing Ctrl+S on your keyboard.
- To mark an invoice as paid in QuickBooks, open the invoice and click the “Pay” button in the upper-right corner
- In the “Payment method” drop-down menu, select the payment method you used to pay the invoice
- Enter the date you paid the invoice in the “Date” field
- If you’re printing a check to pay the invoice, enter the check number in the “Check #” field
- Click “Save & Close
How to Mark an Invoice as Paid & Find an Invoice by Number in Quickbooks Online
Can I Manually Mark an Invoice As Paid in Quickbooks?
Yes, you can manually mark an invoice as paid in QuickBooks. To do so, open the invoice and click the “Mark as Paid” button at the top of the screen. This will bring up a dialog box where you can enter the date and payment method for the payment.
Once you have entered this information, click “OK” to save your changes.
Anúncios
How Do I Mark As Paid in Quickbooks Desktop?
To mark an invoice as paid in QuickBooks Desktop, open the invoice and click the “Pay” button in the upper right corner. This will bring up a window where you can select your payment method, enter the amount you’re paying, and add any relevant information about the payment. Once you’ve entered all the relevant information, click “Record Payment” to save your changes.
How Do I Change Invoice Status to Paid in Quickbooks?
Assuming you’re using QuickBooks Online:
1. Go to the Sales tab and select Customers.
2. Find the customer in question and click on their name to open their profile.
3. Click on the Transactions tab, then locate the invoice in question and click View/Edit.
4. In the top right-hand corner, change the Status dropdown menu from Unpaid to Paid. Save your changes by clicking Done in the bottom right-hand corner.
Anúncios
How Do I Mark an Invoice As Paid in Bill Com?
Assuming you would like a step-by-step guide on how to mark an invoice as paid in Bill.com:
1. Log in to your Bill.com account and go to the “Invoices” tab.
2. Find the invoice that you would like to mark as paid and click on it to open up the details page for that invoice.
3. On the right side of the screen, under the “Actions” heading, click on the “Mark as Paid” button.
4. A pop-up window will appear asking you to confirm that you would like to mark the invoice as paid – click on the “OK” button to continue.
5. The invoice will then be marked as paid and a green “Paid” stamp will appear next to it indicating this status change.

Credit: quickbooks.intuit.com
How to Mark an Invoice As Paid in Quickbooks Desktop
If you’re using Quickbooks Desktop to manage your finances, you may find yourself needing to mark an invoice as paid. Here’s how to do it:
1. Open the invoice that you need to mark as paid in Quickbooks Desktop.
2. Click on the “Payments” tab at the top of the screen.
3. Enter the date that you made the payment and any other relevant information in the fields provided.
4. Click “Save & Close” when you’re finished.
That’s all there is to it! Marking an invoice as paid in Quickbooks Desktop is quick and easy once you know where to find the right tools.
How to Mark Invoices As Paid in Quickbooks Online
Assuming you’ve already logged into QuickBooks Online, here’s how to mark invoices as paid:
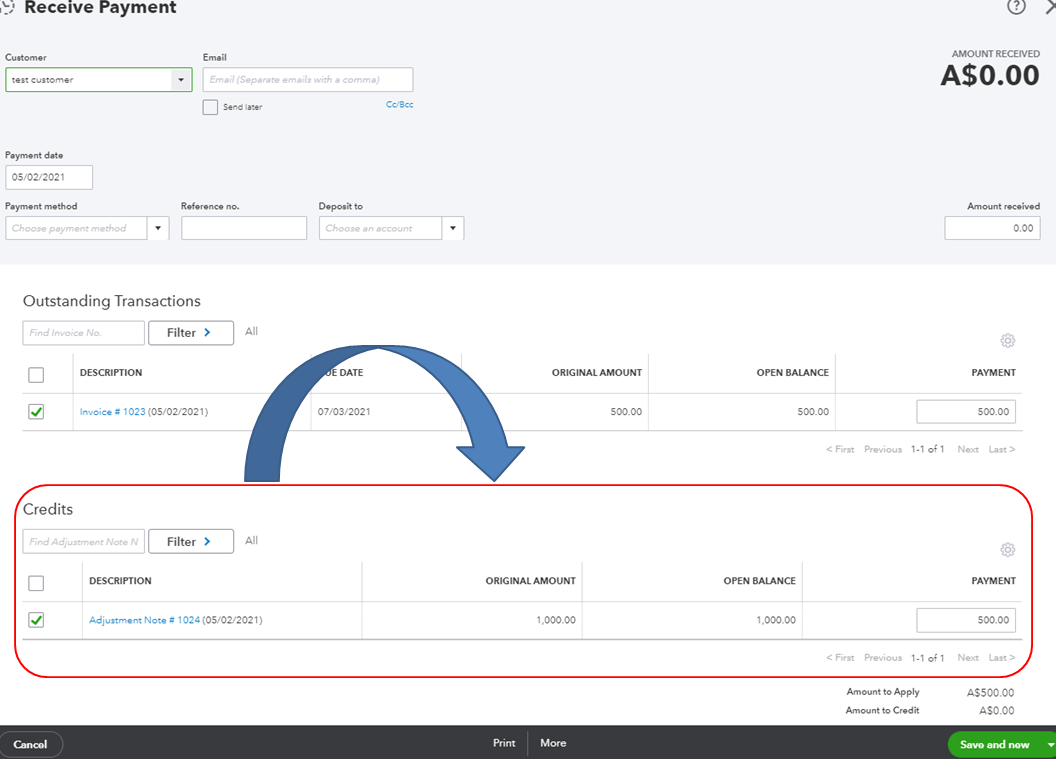
1. Click the “+” icon in the left sidebar and select “Receive Payment.”
2. Select the customer whose invoice you’re paying.
3. Enter the amount being paid and choose the account that you’re paying from. If you need to, you can also click “Add new” next to “Payment method” to create a new payment method for this payment.
4. Underneath the line items for this customer, select the checkbox next to each invoice that this payment is applying to.
You can also apply a partial payment to an invoice by entering the amount in the “Amount applied” column next to it.
How to Mark Invoice As Paid in Quickbooks Self-Employed
Assuming you’re using QuickBooks Self-Employed, setting an invoice as “Paid” is a two-step process. First, go to the Transactions tab and find the invoice in question. Then, click the checkbox next to the date to mark it as paid.
That’s all there is to it! Once an invoice is marked as paid in QuickBooks Self-Employed, it’ll be reflected in your reports accordingly.
Conclusion
If you’re using Quickbooks to manage your business finances, you may be wondering how to mark an invoice as paid. The process is actually quite simple. Here’s a step-by-step guide:
1. Open the invoice in Quickbooks and click the “Pay” button.
2. Select the payment method (e.g., check, cash, credit card) and enter the relevant information.
3. Click “Record Payment.”
4. That’s it! The invoice will now be marked as paid in Quickbooks.


